CD for Inventory Micro App
Extending the Inventory Micro app to include Continuous Delivery to Test.
Guide
This Micro App guidance continues to build upon the microserivces that were built in the Inventory Micro App guide. Make sure you have complete Inventory App or deployed the working Inventory Solution.
we implemented the three tiers in the Inventory Mico App and deployed the app to the
devnamespace/project.We will take that app and make these additions.
Deploy the app to the
testnamespace/project using CD techniques and ArgoCD
Using CD to deploy to Test
ArgoCD is a tool that provides continuous delivery for projects and applications. If you haven’t already, be sure to read through the Continuous Delivery with ArgoCD guide.
For this exercise, we are going to use ArgoCD to push the Inventory app from dev to test (and possibly staging as well). If you have already completed the Inventory Micro App , then it can be used for the ArgoCD process (although perhaps with some minor pipeline updates). If you haven’t completed the exercise, you can start from the solution repositories to perform the ArgoCD steps.
Set up the GitOps repo
Let’s get started with using Argo CD.
Create a new repo from the ArgoCD Code Pattern
Clone the project to your machine
Create a branch named
testgit checkout -b testPush the branch to the remote
git push -u origin testCreate the test namespace with the CLI by running
oc sync test-{initials} --dev
Register the GitOps repo in ArgoCD
Now that the repository has been created, we need to tell ArgoCD where it is.
Get the ArgoCD login information from the
oc credentialscli commandLog into ArgoCD (use
oc credentialsto obtain your credentials and login to argo)Click on the gear icon on the left menu to access the Settings options

Select the
RepositoriesoptionClick either the
Connect Repo using HTTPSorConnect Repo using SSHbutton at the top and provide the information for the GitOps repo you just created.
Create a project in ArgoCD (Optional)
In ArgoCD terms, each deployable component is an Application and applications are grouped into Projects. Projects are not
required for ArgoCD to be able to deploy applications but it helps to organize applications and provide some restrictions
on what can be done for applications that make up a project.
To create a project, do the following:
Log into ArgoCD
Click on the gear icon on the left menu to access the Settings options

Select the
ProjectsoptionClick the
New Projectbutton at the top of the page.Provide the following values then press
Create:name- the name for the project (provide `inventory-management)description- a brief description of the projectsources- clickadd sourceand pick the Git repository from the list that was added previouslydestinations- Add `https://kubernetes.default.svc` for the cluster url and `test-{initials}` for the namespace- Add `https://kubernetes.default.svc` for the cluster url and `staging-{initials}` for the namespaceNote: Initially, the only cluster that is available is the one in which ArgoCD is -
https://kubernetes.default.svc. By adding the two destinations we have allowed the project to be deployed to both thetest-{initials}andstaging-{initials}namespaces within the current cluster.
Configure the GitOps repo for Inventory Management service
Copy the
app-artifactoryfolder and give it a name that matches the Inventory Management service component (e.g.inventory-management-svc-{initials})Update
inventory-management-svc-{initials}/Chart.yamland update the name to match the directory nameUpdate
inventory-management-svc-{initials}/requirements.yamlwith the following values:name- the name of helm chart/image. This should match the folder nameversion- the version number of the helm chartrepository- the url to the helm repository including the folder where helm charts are being stored.
here is an example
dependencies:- name: inventory-management-svc-mjpversion: 1.0.0-1repository: http://artifactory.mooc-one-rhos-cluster.us-east.containers.appdomain.cloud/artifactory/generic-local/mooc-team-one/The url of the Artifactory helm repository can be determines by following these steps:
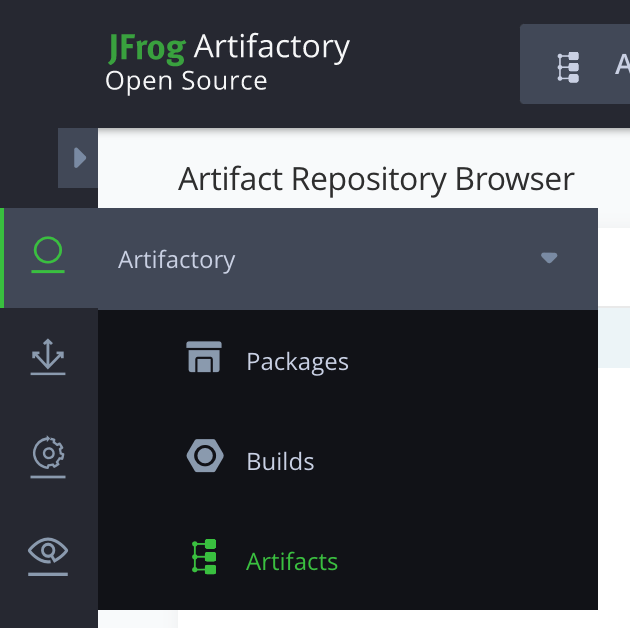
Log into Artifactory (use
igc credentialsto obtain your credentials and login to artifactory console).Go to the Artifactory tab and select “Artifacts”.
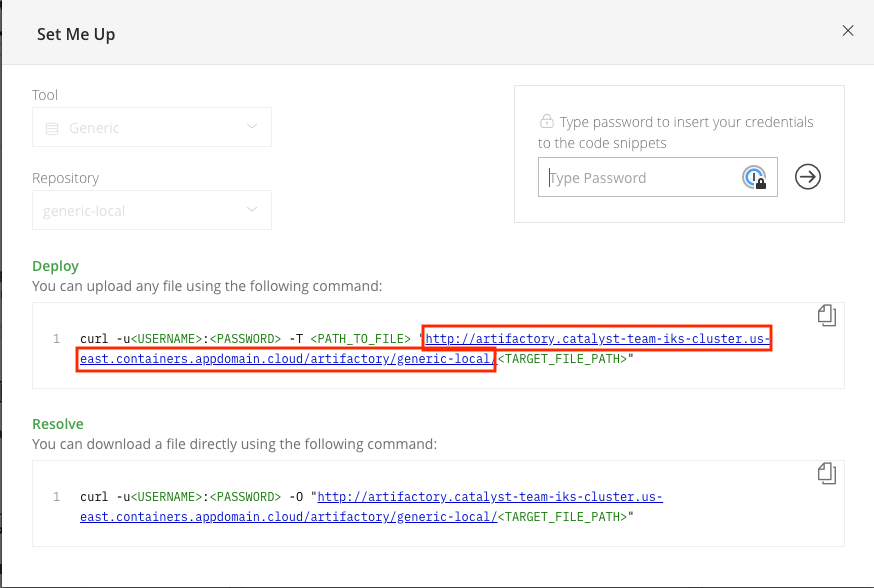
Click on Set Me Up.

In the Set Me Up Section, select the tool as “Generic” and repository as “generic-local”.Copy the deploy URL from the Set Me Up dialog box. That is the Artifactory helm repository URL.

Run
kubectl get configmap/ibmcloud-config -n tools -o yamlto print the configuration information for the clusterIn
inventory-management-svc-{initials}/values.yamlreplace<app-chart-name>with the directory name. ReplaceingressSubdomainwith the value from the previous step. UpdatetlsSecretNamewith the value from the previous step. The result should look something like the followinginventory-management-svc-{initials}/values.yamlglobal:ingressSubdomain: sms-test.us-south.containers.appdomain.cloudtlsSecretName: sms-test-clusterinventory-management-svc-{initials}:replicaCount: 1ingress:enabled: trueCommit and push the changes
git add .git commit -m "Adds inventory-management-svc config"git push
Add an application in ArgoCD for the Inventory Management service
The last step in the process is to define the application(s) within ArgoCD that should be managed. This consists of connecting the config within the Git repo to the cluster and namespace.
Log into ArgoCD
Click
New Applicationand provide the following values:application name-test-inventory-management-svcproject-inventory-managementsync-policy-Automaticrepository url- The Git url where the configuration is storedrevision-testpath-inventory-management-svc-{initials}destination cluster- The cluster url for the deploymentdestination namespace-test-{initials}values file-values.yaml
Click
CreateClick on the newly created application. A graph of kubernetes resources should be shown if everything is configured correctly.
Make a change in the GitOps repo
In order to trigger a (re-)deployment we can make an update to a value in the GitOps repo and watch ArgoCD apply the change.
Open a terminal and navigate to your GitOps repo directory
Be sure that you are in the
testbranchgit checkout testUpdate
inventory-management-svc-{initials}/values.yamlto increase the replica countinventory-management-svc-{initials}/values.yamlglobal:ingressSubdomain: sms-test.us-south.containers.appdomain.cloudtlsSecretName: sms-test-clusterinventory-management-svc-{initials}:replicaCount: 3ingress:enabled: trueCommit and push the change
git add .git commit -m "Increases replica count"Log into the ArgoCD UI and look at the state of the application. It should say
Synchronizing. If you don’t want to wait you can manually by pressing theSynchronizebutton.
Hook the CI pipeline to the CD pipeline
The last stage in the CI pipeline updates the version number in the requirements.yaml to the version of the helm chart
that was just built. Through a couple naming conventions the only thing the pipeline needs in order to interact
with the CD process is a kubernetes secret named gitops-cd-secret that provides the details needed
to connect to the git repo to push updates.
The IGC CLI has a command that provides a helper to make the creating of a kubernetes secret with git credentials very easy.
Log into the cluster on the command-line.
Change the directory to the root of the ArgoCD Code Pattern repo that was cloned previously.
Run
igc git-secret gitops-repo -n dev-{initials}to create the secret. This command will prompt for the username, personal access token, and the branch to put in the secret.
What just happened?
The
git-secretcommand creates a secret in a kubernetes namespace containing the url, username, password, and branch information for a git repo. In the command above, we providedgitops-cd-secretfor the secret name. (If that value is left off the secret name defaults to{git org}.{git repo}.). It creates a secret “git-credentials” and configmap “gitops-cd-secret” You can verify the secret was created by running:kubectl get configmap/gitops-cd-secret -n dev-{initials} -o yaml
Note:
For the secret to be available to the CI pipeline, the secret needs to be created in the same namespace where the pipeline is running (e.g.
dev-{initials}).The value provided for
branchis the one the pipeline will use to when committing changes to trigger the CD pipeline.testis the recommended value for the branch field.Trigger the pipeline for the Inventory Management service to build by making a change to the Inventory Management Service code and push the changes to Git.
Repeat for BFF and UI components
Starting from Configure the GitOps repo for Inventory Management service, the steps need to be repeated for each application within the project.