Developer Tools Setup
To enable the best experience for working through the hands on exercises you need to select the environment you plan to use for development and the tools you require to integration to the IBM Cloud.
- If you are going to use your desktop/laptop for hands on exercises, follow the instructions in Desktop/Laptop tab. You will require a modern MacOS or Windows 10 operating systems for he Desktop/Laptop option
- If you cannot install tools on your desktop/laptop, follow the Cloud Shell instructions
- If you want to try the full web IDE experience, then follow the Code Ready Workspaces setup instructions
Once you have completed these setup requirements you will be ready to complete the Developer Intermediate agenda.
Config Cloud Shell
IBM Cloud Shell is instantly accessible from your free IBM Cloud account — no other installation is needed.
IBM Cloud Shell is a free service from IBM which gives you complete control of your cloud resources, applications and infrastructure, from any web browser.
Features of IBM Cloud Shell include:
Preconfigured environment IBM Cloud Shell provides a curated, cloud-based workspace with dozens of preinstalled tools and programming languages. It automatically authenticates to your IBM Cloud account so you can get right to work.
File upload/download Utilize file upload/download functionality to import files to IBM Cloud Shell, or pull down data to your local machine.
Multiple sessions Use up to five shell sessions at a time to maximize your productivity. Mirror workflows on your local machine, or view logs on one session while editing a file in another
Set up Cloud Shell
Login to IBM Cloud console (cloud.ibm.com), if not already done
Invoke Cloud shell by clicking on the button at the top right hand corner of the browser window

Install
igcby running the following commands on the just newly opened terminal:git clone https://github.com/ibm-garage-cloud/cloud-shell-commands.gitexport PATH=~/cloud-shell-commands:$PATHsource ./cloud-shell-commands/install-igcSuccessful execution will look like this.
$ git clone https://github.com/ibm-garage-cloud/cloud-shell-commands.gitCloning into 'cloud-shell-commands'...remote: Enumerating objects: 50, done.remote: Counting objects: 100% (50/50), done.remote: Compressing objects: 100% (44/44), done.remote: Total 50 (delta 23), reused 14 (delta 4), pack-reused 0Unpacking objects: 100% (50/50), done.Checking connectivity... done.$ export PATH=~/cloud-shell-commands:$PATHYou can check the CLI tools were installed correctly by checking the version
$ oc sync --version0.5.3
Install CLIs and tools
The following is a list of desktop tools required to help with installation and development.
Git Client: Needs to be installed in your development operating system, it comes as standard for Mac OS
IBM Cloud CLI: Required for management of IBM Cloud Account and management of your managed IBM Kubernetes and Red Hat OpenShift clusters
- Don’t install just the IBM Cloud CLI, install the IBM Cloud CLI and Developer Toolscurl -sL https://ibm.biz/idt-installer | bash
- Note: If you log in to the web UI using SSO, you’ll need to create an API key for logging into the CLI. (You can also use this API key for installing the Developer Tools environment.)
- Don’t install just the IBM Cloud CLI, install the IBM Cloud CLI and Developer Tools
OpenShift OC CLI: Required for Red Hat OpenShift management and development
Place
ocandkubectlin your TerminalPATHMacOS/Linux
Once downloaded navigate to Download folder
cd ~/Downloads/openshift-origin-client-tools-v3/Then copy
ocandkubectlto the system-wide available scripts folder (which is already in your PATH)cp kubectl /usr/local/bin/kubectlcp oc /usr/local/bin/oc
Docker Desktop: Required for running common tools and Developer Tools Image
- Installed and running on your local machine
Node: Required for running the IBM Garage for Cloud CLI
- Installed on your local machine
- Recommended
v12.x LTS
IBM Garage for Cloud CLI: Used to help make working with the development tools as easy as possible
npm i -g @ibmgaragecloud/cloud-native-toolkit-cliTekton CLI: Used to help control Tekton pipelines from the command line.
brew tap tektoncd/toolsbrew install tektoncd/tools/tektoncd-cliVisual Studio Code: A popular code editor
- You will be required to edit some files, having a good quality editor is always best practice
- Enabling launching VSCode from a terminal
JDK 11: Optional installed on your local machine
- Used for SpringBoot content
Code Ready Workspace
CodeReady Workspaces is a developer workspace server and cloud IDE. Workspaces are defined as project code files and all of their dependencies necessary to edit, build, run, and debug them. Each workspace has its own private IDE hosted within it. The IDE is accessible through a browser. The browser downloads the IDE as a single-page web application. CodeReady Workspaces will enable a 100% developer experience to be delivered from a users browser.
Red Hat CodeReady Workspaces provides:
- Workspaces that include runtimes and IDEs
- RESTful workspace server
- A browser-based IDE
- Plugins for languages, framework, and tools
- An SDK for creating plugins and assemblies
CRW in Workshop
CodeReady Workspaces includes a powerful in-browser IDE with support for Microsoft Visual Studio Code extensions. As part of the workshop, we need only a machine capable of running a web browser through which CRW will provide an integrated environment to access the code repo, and the build environment to develop the code and then test, and deploy on an OpenShift environment
Setting up your Workspace on CRW
Login to the Openshift Cluster through the Web console, where the Code ready workspace is setup.
Access the Code Ready Workspace through the appropriate Code ready workspace URL that would have been shared. Note:If the code ready workspace is configured through openshiftoAuth, You can access the above URL, once you have logged into the Openshift Cluster
If you are accessing it for the first time you need register as the registration page will be shown. User name can contain only these characters (0-9, a-z and hypen in between). Ensure you provide details regarding username, Email, First name and Last name (If SSO is not configured, you need to provide the password as well.
Navigate to the default Code Ready Workspace link on your browser as shown in below picture.
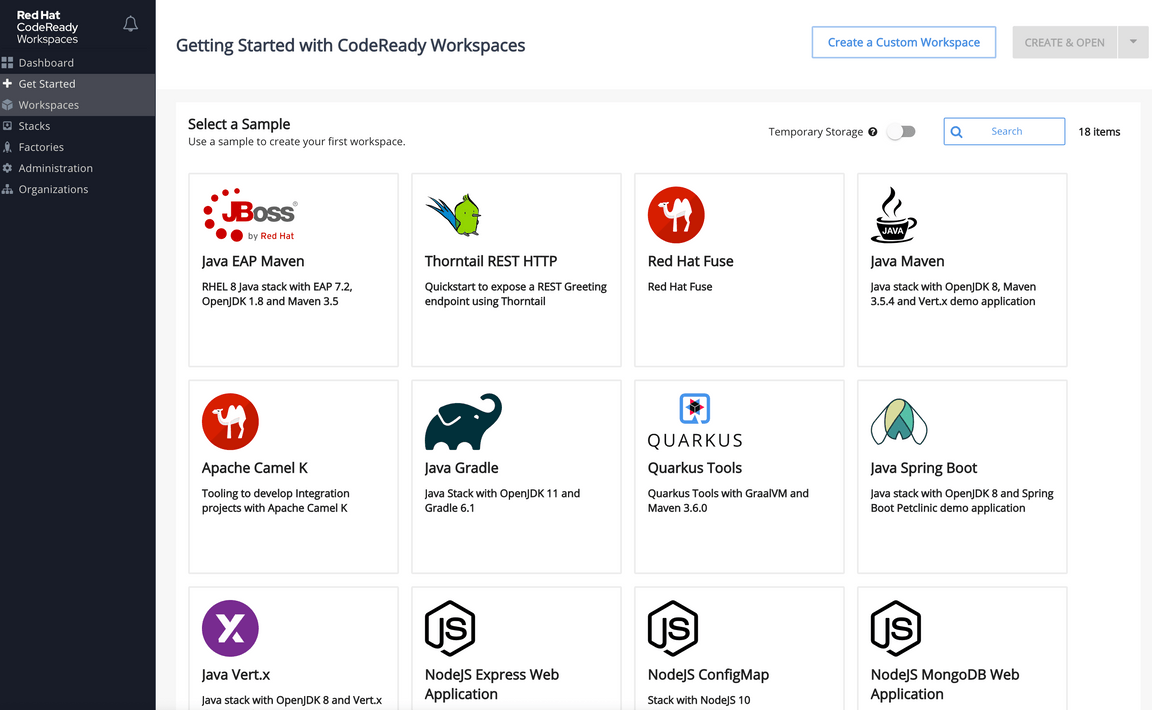
You can create the workspace by selecting one of the template stacks as shown in Step 4. Alternatively, navigate to the Workspace and click on the “Add Workspace” button.

Provide the workspace as part of the Name field. Click on “Remove” button in the Projects section to remove the project template. Basically, we are going to create an empty project.
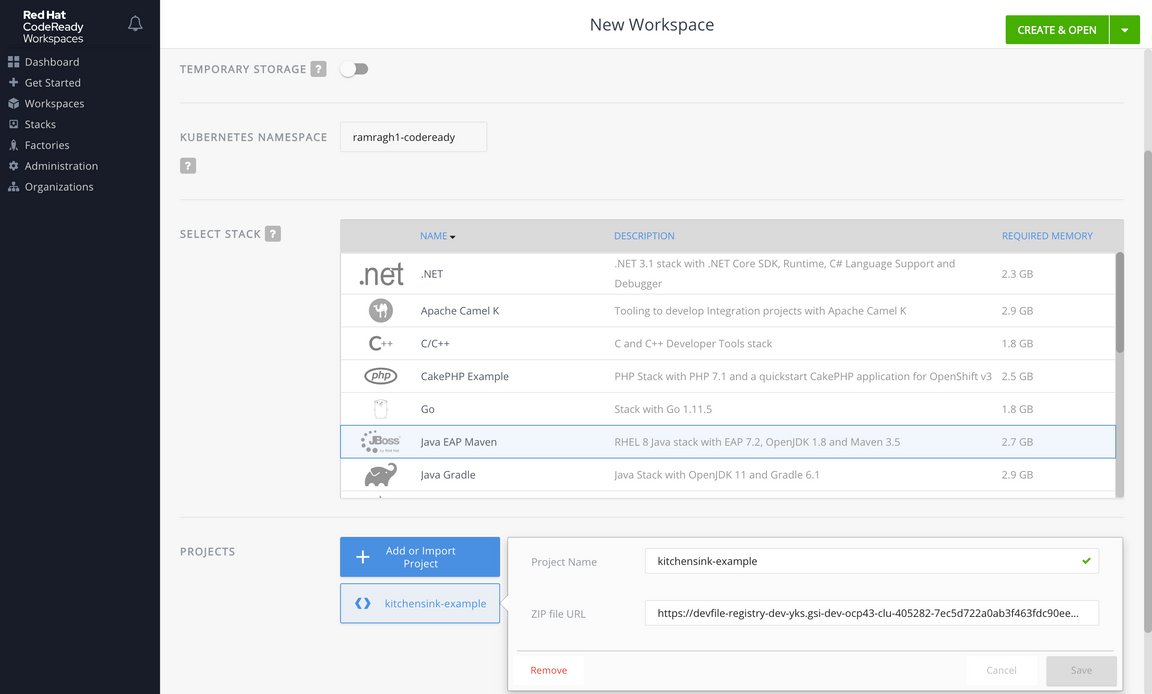
Click on “Create and Open” button to create and load the workspace. Workspace will start loading. This may take a few minutes as the Container and plug-ins related to the stack has to be created and deployed.
Once the workspace is created and loaded, you can see a vscode editor.
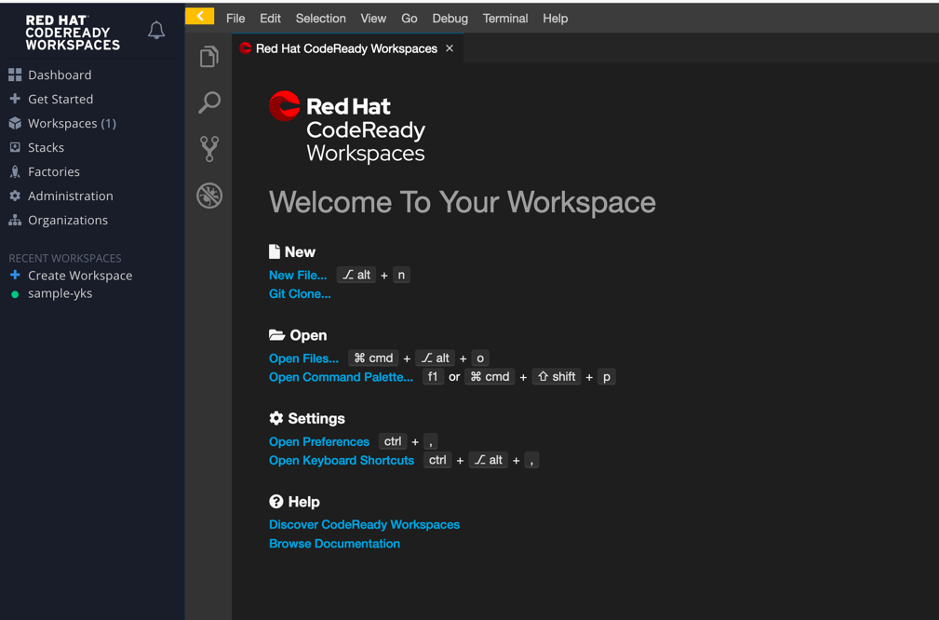
Go to “Terminal” menu and select “Open Terminal in specific container”.
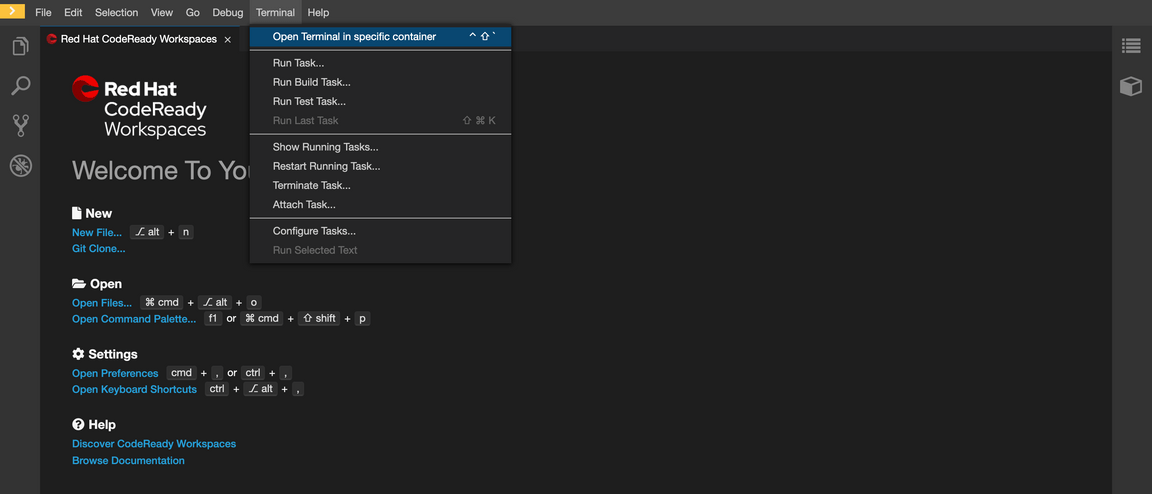
Select the “Developer Container”.
Install
igcby running the following commands on the just newly opened terminal:git clone https://github.com/ibm-garage-cloud/cloud-shell-commands.gitexport PATH=~/cloud-shell-commands:$PATHsource ./cloud-shell-commands/install-igcSuccessful installation will look something like this.
$ git clone https://github.com/ibm-garage-cloud/cloud-shell-commands.gitCloning into 'cloud-shell-commands'...remote: Enumerating objects: 50, done.remote: Counting objects: 100% (50/50), done.remote: Compressing objects: 100% (44/44), done.remote: Total 50 (delta 23), reused 14 (delta 4), pack-reused 0Unpacking objects: 100% (50/50), done.Checking connectivity... done.abalasu1:~/inventory-svc-ab$ export PATH=~/cloud-shell-commands:$PATHYou can check the CLI tools were installed correctly by checking the version
$ oc sync --version0.5.3
Log into IBM Cloud
Use
ibmcloudCLI command line to log into the cloud account. Replace the user_id, password and team name in the sandbox nameibmcloud login -u <user_id> -p <password> -g sandbox-team-n.. -r us-southSelect Account Number that you are boarded on.
$ ibmcloud login -u email@company.com -p XXX -g sandbox-team-one -r us-southAPI endpoint: https://cloud.ibm.comAuthenticating...OKSelect an account:1. GSI Labs - IBMEnter a number> 1Targeted account GSI Labs
Log into Openshift Cluster
Log into the openshift cluster from the cloud console
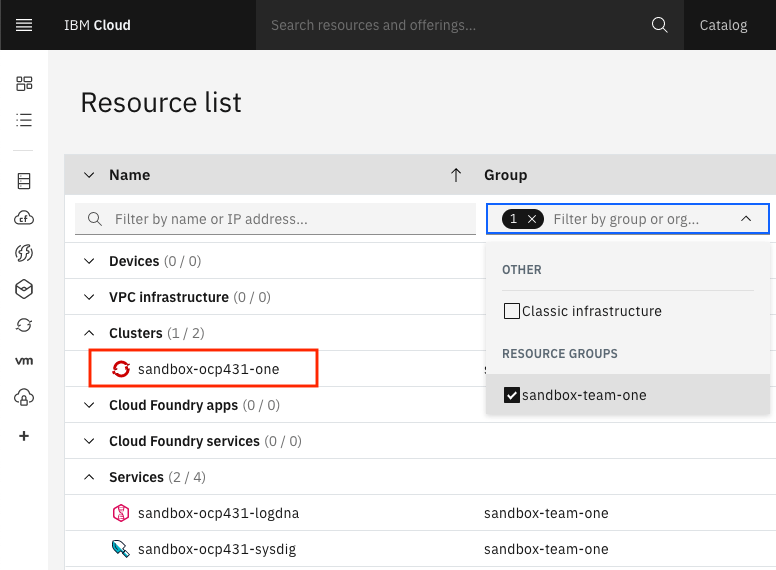
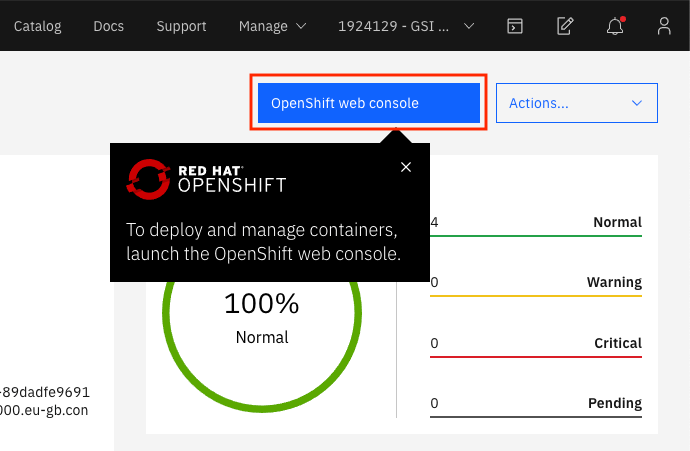
Access the openshift console by clicking on the button
Get the login command with token to login to the openshift from command line
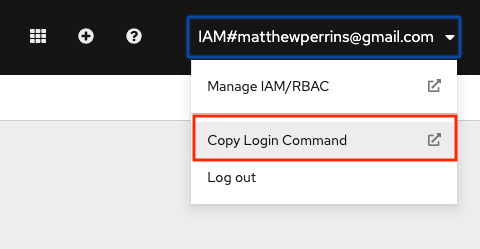
Execute the login command copied in the last step in the terminal
$ oc login --token=qvARHflZDlOYfjJZRJUEs53Yfy4F8aa6_L3ezoagQFM --server=https://c103-e.us-south.containers.cloud.ibm.com:30979Logged into "https://c103-e.us-south.containers.cloud.ibm.com:30979" as "IAM#email@company" using the token provided.You have access to 71 projects, the list has been suppressed. You can list all projects with 'oc projects'Using project "dev-ab".$
Configure git
Execute the following commands
git config --global user.email "<email>"git config --global user.name "<short_name>"
