Inventory Service
Develop and deploy the backend component of the inventory application
Setup
Create the initial project and register it with a pipeline for automated builds.
Create a new repository from the Spring Boot Microservice template. Make the cloned repository public.
You can also access this template on the Code Patterns page in the Developer Dashboard.
In order to prevent naming collisions, name the repository
inventory-management-svc-{your initials}, replacing{your initials}with your actual initials.Clone the new repository to your machine
git clone https://github.com/ibm-workshop-team-one/inventory-svc-{your initials}.gitGo into the repository directory cloned and execute the following
oc sync dev-{your initials} --devRegister the pipeline register the pipeline
oc pipeline --tektonreplacing
{your initials}with your actual initialsGive git credentials if prompted, and master as the git branch to use. When prompted for the pipeline, select igc-java-gradle-v1-2-0
$ oc pipeline --tektonCreating pipeline on openshift cluster in dev-ab namespaceGetting git parametersGit credentials have already been stored for user: abalasu1Project git repo: https://github.com/ibm-workshop-team-one/inventory-svc-ab.git? Provide the git branch that should be used: masterCreating service account: pipelineCreating Git PipelineResourceCreating Image PipelineResourceOpen the pipeline to see it running
When the pipeline is completed, run
oc endpoints -n dev-{your initials}. You should see an entry for the app we just pushed. Select the entry and hitEnterto launch the browser. If you are developing on code ready workspaces/cloud shell, copy the url and paste it in a new browser window.Run the service locally
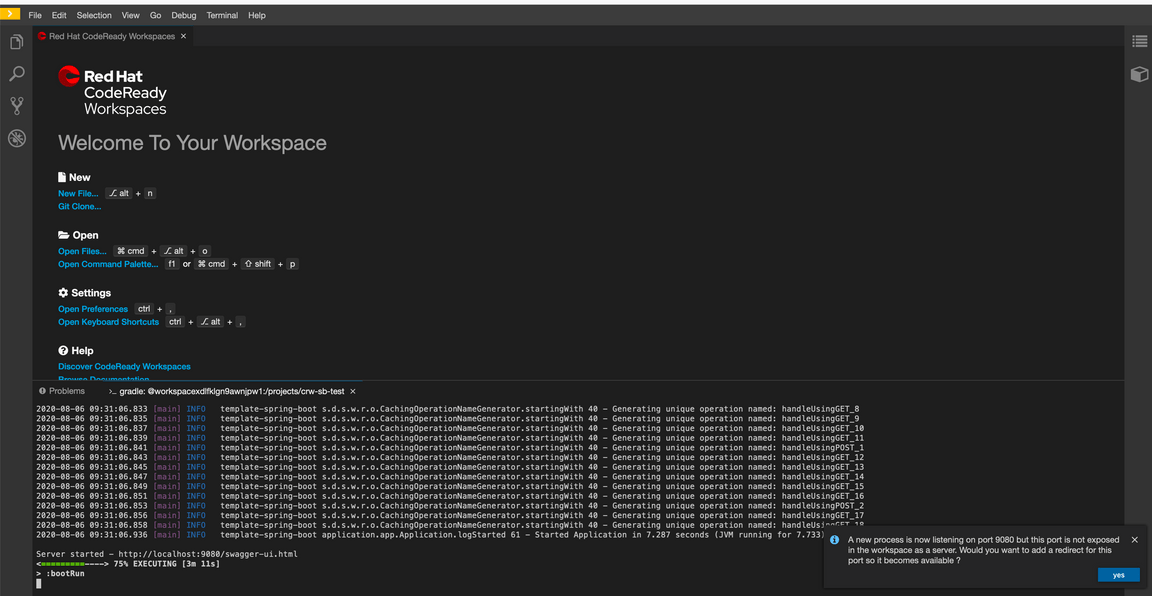
./gradlew bootRunWhen the execution output says “Server started”, the app is running.
Access the running service. This service runs on port 9080.
To view the running app click on the Eye Icon on the top right and select the port
9080this will open a browser tab and display the running app on that port.
Click on yes

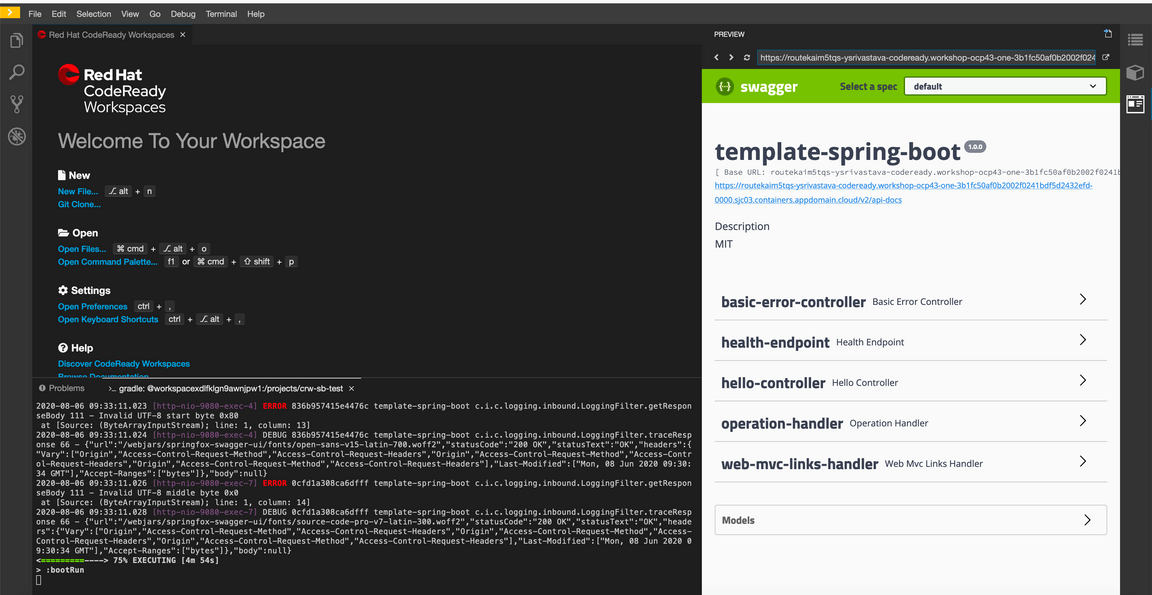
Click on open link

To view this application in new tab click top right corner arrow icon

This will display the Swagger UI page that provides a user interface to exercise the APIs.
Create initial components
Spring Boot uses annotations to configure the various components that will be injected into and
used by the applications. A class with the @SpringBootApplication annotation is the starting
point for the rest of the application components to be loaded. Additionally, a @ComponentScan
annotation can be added to tell the Spring infrastructure which packages should be scanned
for components.
We will start by creating the initial application component.
Create a class named
Applicationin thecom.ibm.inventory_management.apppackage.Add the
@SpringBootApplicationand@ComponentScanannotation to the class. The@ComponentScanannotation should includecom.ibm.inventory_management.*,com.ibm.cloud_garage.*, andcom.ibm.healthpackages.
src/main/java/com/ibm/inventory_management/app/Application.javapackage com.ibm.inventory_management.app;import org.springframework.beans.factory.annotation.Autowired;import org.springframework.boot.CommandLineRunner;import org.springframework.boot.SpringApplication;import org.springframework.boot.autoconfigure.SpringBootApplication;import org.springframework.boot.builder.SpringApplicationBuilder;import org.springframework.boot.web.servlet.support.SpringBootServletInitializer;import org.springframework.context.ApplicationContext;
- Delete
application.app
git rm -r src/main/java/application/
Run the service locally. The swagger page should no longer contain the
/helloAPI endpoint.Commit and push the changes to Git.
git add .git commit -m "Adds Application and Removes default Application class"git push
Add StockItem controller
In Spring Boot, the @RestController annotation tells the framework that the class provides a
REST interface. Additional annotations like @GetMapping are used to provide the specific configuration
for the REST service.
Start the tests in tdd mode with
npm run tdd(or./gradlew test --continuous)Add a StockItemControllerTest.java in
com.ibm.inventory_management.controllersunder thetestfolder
src/test/java/com/ibm/inventory_management/controllers/StockItemControllerTest.javapackage com.ibm.inventory_management.controllers;import org.junit.jupiter.api.DisplayName;@DisplayName("StockItemController")public class StockItemControllerTest {}
- Add the MockMvc infrastructure and create the
StockItemController
src/test/java/com/ibm/inventory_management/controllers/StockItemControllerTest.javapackage com.ibm.inventory_management.controllers;import static org.mockito.Mockito.spy;import org.junit.jupiter.api.BeforeEach;import org.junit.jupiter.api.DisplayName;import org.springframework.test.web.servlet.MockMvc;import org.springframework.test.web.servlet.setup.MockMvcBuilders;
src/main/java/com/ibm/inventory_management/controllers/StockItemController.javapackage com.ibm.inventory_management.controllers;public class StockItemController {}
- Add the tests for the controller behavior and make the corresponding changes to make the tests pass
src/test/java/com/ibm/inventory_management/controllers/StockItemControllerTest.javapackage com.ibm.inventory_management.controllers;import static org.mockito.Mockito.spy;import static org.springframework.test.web.servlet.request.MockMvcRequestBuilders.get;import static org.springframework.test.web.servlet.result.MockMvcResultMatchers.content;import static org.springframework.test.web.servlet.result.MockMvcResultMatchers.status;import org.junit.jupiter.api.BeforeEach;import org.junit.jupiter.api.DisplayName;
src/main/java/com/ibm/inventory_management/controllers/StockItemController.javapackage com.ibm.inventory_management.controllers;import java.util.ArrayList;import java.util.List;import org.springframework.web.bind.annotation.GetMapping;import org.springframework.web.bind.annotation.RestController;@RestController
- Start the local server
./gradlew bootRun
To view the running app click on the Eye Icon on the top right and select the port
9080this will open a browser tab and display the running app on that port.
Click on yes

Click on open link

To view this application in new tab click top right corner arrow icon

- Commit and push the changes to Git.
git add .git commit -m "Adds StockItemController"git push
Add a service for providing results
An established pattern for REST services in Spring Boot is to keep the REST controller logic simple
and focused on translating from REST protocols to Javascript. The business logic for the components
should be placed in a component that is given a @Service annotation.
- Update the controller test to include returning data from the service
src/test/java/com/ibm/inventory_management/controllers/StockItemControllerTest.javapackage com.ibm.inventory_management.controllers;import static org.mockito.Mockito.mock;import static org.mockito.Mockito.spy;import static org.mockito.Mockito.when;import static org.springframework.test.web.servlet.request.MockMvcRequestBuilders.get;import static org.springframework.test.web.servlet.result.MockMvcResultMatchers.content;import static org.springframework.test.web.servlet.result.MockMvcResultMatchers.status;
src/main/java/com/ibm/inventory_management/models/StockItem.javapackage com.ibm.inventory_management.models;import java.io.Serializable;public class StockItem implements Serializable {private String name;public String getName() {return name;
src/main/java/com/ibm/inventory_management/services/StockItemApi.javapackage com.ibm.inventory_management.services;import java.util.List;import com.ibm.inventory_management.models.StockItem;public interface StockItemApi {List<StockItem> listStockItems();}
src/main/java/com/ibm/inventory_management/controllers/StockItemController.javapackage com.ibm.inventory_management.controllers;import java.util.List;import org.springframework.web.bind.annotation.GetMapping;import org.springframework.web.bind.annotation.RestController;import com.ibm.inventory_management.models.StockItem;import com.ibm.inventory_management.services.StockItemApi;
At this points the tests should pass even though we haven’t provided an implementation of the service yet since we are creating a mocking the service in the unit test
Update the
StockItemmodel to include the remaining fields
src/main/java/com/ibm/inventory_management/models/StockItem.javapackage com.ibm.inventory_management.models;import java.io.Serializable;public class StockItem implements Serializable {private String name;private String id = null;private int stock = 0;private double price = 0.0;
- Provide an implementation of the service that just returns a couple of hard-coded data values, for now. Services are
denoted in Spring Boot with the
@Serviceannotation
src/main/java/com/ibm/inventory_management/services/StockItemService.javapackage com.ibm.inventory_management.services;import static java.util.Arrays.asList;import java.util.List;import org.springframework.context.annotation.Primary;import org.springframework.stereotype.Service;
- Replace the
api()method in the SwaggerDocket class to restrict the swagger page to only show the/stock-itemsAPI
src/main/java/com/ibm/cloud_garage/swagger/SwaggerDocket.java@Beanpublic Docket api() {return new Docket(DocumentationType.SWAGGER_2).select().apis(buildApiRequestHandler()).paths(PathSelectors.regex(".*stock-item.*")).build().apiInfo(buildApiInfo());}
Verify the service locally and push the changes
Start the application
./gradlew bootRun
To view the running app click on the Eye Icon on the top right and select the port
9080this will open a browser tab and display the running app on that port.
Click on yes

Click on open link

To view this application in new tab click top right corner arrow icon

Run the service by selecting
Try it outthenExecuteYou should see the data we defined in the service in the previous section
Commit and push the changes to git
git add .git commit -m "Adds StockItem service implementation"git push
- The pipeline should kick off and you will be able to see the running service by running
oc endpoints -n dev-{initials}and selecting the route of your service