App ID Integration
Securing Inventory App with App ID
To secure the application we are using the capabilities available within the IBMCloud platform that use
a simple annotation on the ingress to enable integration with AppId. The Code Patterns have already been
set up to use this feature and all that is required is update the configuration within the values.yaml
file of the helm chart.
Inventory Management UI
Find the app id binding secret by running the following command from a terminal where the kubernetes context has been set up (i.e.
oc loginhas been done)kubectl get -n dev secrets | grep -E "binding.*appid"Update the
values.yamlfile in the Inventory Management UI chart to setingress.appId.enabled=trueand to set the value for the AppId binding secret from the previous step/chart/template-node-react/values.yaml...ingress:enabled: trueappid:enabled: true# web or app - https://cloud.ibm.com/docs/services/appid?topic=appid-kube-authrequestType: webbinding:
AppId redirect url config
Get the ingress for the UI component by running
igc ingress -n dev-{initials}.Open the IBM Cloud resource list -
https://cloud.ibm.com/resourcesOpen the AppId instance to the
Manage Authentication->Authentication Settingsview
Add the redirect url for the application to the web redirect URLs. The redirect url will have the following form:
`{ingress url}/appid_callback`e.g. `https://inventory-manangement-ui-dev.sms-test-oc-cluster.us-east.containers.appdomain.cloud/appid_callback`
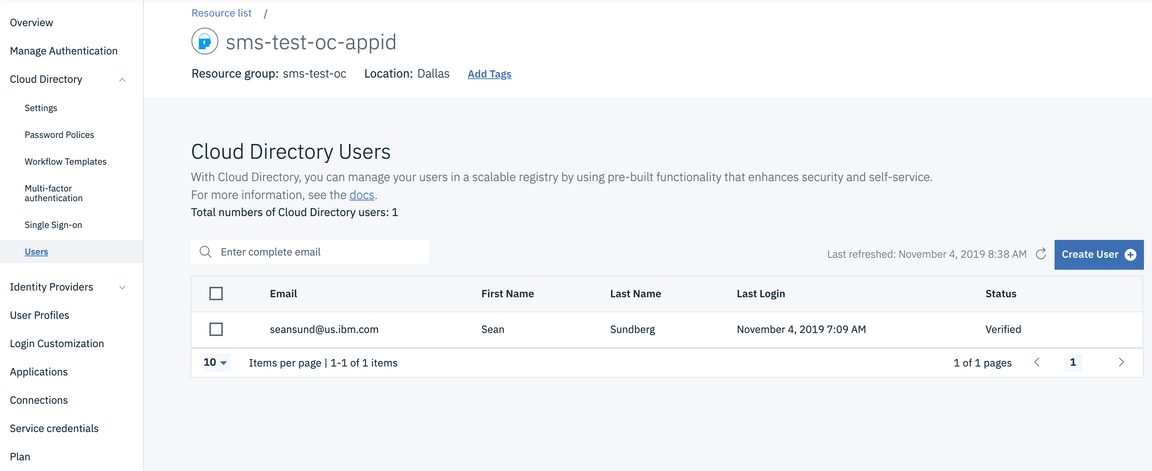
Add users to AppId
Open the AppId instance to
Cloud Directory->Users
Add yourself as a user with an email address, name, and password
Access the UI
Open a browser to the UI ingress
You should be met with the AppId login screen. (This screen can be customized from the AppId service console but for now we are showing the default screen.)
Provide the email address and password you configured in the previous steps. You should be granted access to the UI.