Install the Toolkit using a Private Catalog
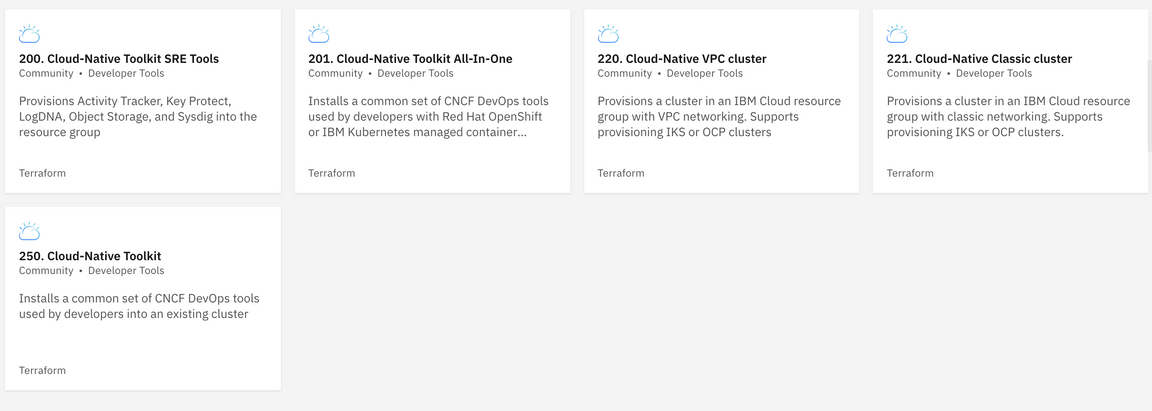
One of the features of the IBM Cloud Catalog is support for private catalog tiles. These can contain custom Terraform definitions that can accelerate SRE teams in the execution of common and repetitive tasks. The Cloud-Native Toolkit tools installation can be configured as a private catalog tile. This is the recommended approach for using this asset multiple times. This asset enables the easy transition of a default cluster into a cluster that supports Cloud-Native CI/CD development tools.

Cloud-Native Toolkit: Tile Installation
Walkthrough of the Cloud Native Toolkit installation on RedHat OpenShift using the Private Catalog on IBM Cloud.
A. Create the catalog
- Log in to the IBM Cloud Console
- Click Manage->Catalogs from the top menu
- Click on Create Catalog
- In the
Create a catalogdialog, provide the following values:- name: the name of the catalog, for example
Team Catalog - description: (optional) a brief description of the purpose of the catalog
- products: select Start with no products
- resource group: click Update to change the default resource group for the catalog
- name: the name of the catalog, for example
- Click Create to complete the catalog creation
B. Register the Cloud-Native Toolkit tiles in the catalog
Run the following command to install the offering tiles into an existing catalog. You will be prompted for your catalog name and IBM Cloud API Key.
bash -c "$(curl -Ls tiles.cloudnativetoolkit.dev)"
Alternatively, the values can be provided to the script via environment variables named CATALOG_NAME and API_KEY.
CATALOG_NAME="Team Catalog" API_KEY="xxxx" bash -c "$(curl -Ls tiles.cloudnativetoolkit.dev)"
C. Apply the tile
Once the tile has been installed it can be used repeatedly to set up clusters with the CNCF tools. Each time the tile is applied, a set of configuration variables are required.
Log in to the IBM Cloud Console.
Select Catalog from the top menu.
From the side menu, select your catalog from the drop-down list (e.g.
Team Catalog). (IBM Cloud catalog should be selected initially.)Click Private on the side menu to see the private catalog entries
Click on the Cloud-Native Toolkit tile
Enter values for the variables list provided.
Variable Description eg. Value ibmcloud_api_keyThe API key from IBM Cloud Console that has ClusterAdmin access and supports service creation {guid API key from Console}resource_group_nameExisting resource group in the account where the cluster has been created dev-team-oneregionThe region where the cluster has been provisioned us-east,eu-gb, etccluster_existsFlag indicating if the cluster already exists. ( falsemeans the cluster should be provisioned)trueorfalsevpc_clusterFlag indicating that the cluster has been built on VPC infrastructure trueorfalsevpc_zone_namesA comma-separated list of the VPC zones that should be used for worker nodes. This value is requored if cluster_existsis set tofalseandvpc_clusteris set totrueus-south-1orus-east-1,us-east-2cluster_nameThe name of the cluster (If cluster_existsis set totruethen this name should match an existing cluster)dev-team-one-iks-117-vpccluster_typeThe type of cluster into which the toolkit will be installed kubernetes,ocp3,ocp4orocp44registry_namespaceThe namespace that should be used in the IBM Container Registry. If not provided the value will default to the resource group name dev-team-one-registry-2020provision_logdnaFlag indicating that a new instance of LogDNA should be provisioned trueorfalselogdna_nameThe name of the LogDNA instance (If provision_logdnais set tofalsethis value is used by the scripts to bind the existing LogDNA instance to the cluster)cntk-showcase-logdnaprovision_sysdigFlag indicating that a new instance of Sysdig should be provisioned trueorfalsesysdig_nameThe name of the Sysdig instance (If provision_sysdigis set tofalsethis value is used by the scripts to bind the existing Sysdig instance to the cluster)cntk-showcase-sysdig
- Check the box to accept the Apache 2 license for the tile.
- Click Install to start the install process
This will kick off the installation of the Cloud-Native Toolkit using an IBM Cloud Private Catalog Tile. The progress can be reviewed from the Schematics entry
Post-installation steps
Once the Terraform has completed, walk through the post installation steps to explore and verify the environment.
Troubleshooting
If you find that the Terraform provisioning has failed, for Private Catalog delete the workspace and for Iteration Zero try re-running the runTerraform.sh script again.
The state will be saved and Terraform will try and apply the configuration to match the desired end state.
If you find that some of the services have failed to create in the time allocated, try the following with Iteration zero:
- Manually delete the service instances in your resource group
- Re-run the
runTerraform.shscript with the--deleteargument to clean up the state./runTerraform.sh --delete