Workshop - Deploy an Artificial Intelligence Microservice
Deploy an Artificial Intelligence Microservice
Prerequisites
- The instructor should Setup Workshop Environment
- The student should Setup CLI and Terminal Shell
Instructor will provide the following info:
- OpenShift Console URL (OCP_CONSOLE_URL)
- The username and password for OpenShift and Git Server (default values are user01, user02, etc.. for users and
passwordfor password).
Set
TOOLKIT_USERNAMEenvironment variable. If you are participation in a workshop replaceuserdemowith your assigned username (ex.user01).TOOLKIT_USERNAME=userdemoLogin to OpenShift using
oc- If using IBM Cloud cluster then login with your IBM account email and IAM API Key or Token by using the Copy Login Command

- If using a cluster that was configured with the workshop scripts outside IBM Cloud then use respective assigned username (ex.
user01), and the password ispassword
oc login $OCP_URL -u $TOOLKIT_USERNAME -p password- If using IBM Cloud cluster then login with your IBM account email and IAM API Key or Token by using the Copy Login Command
Set
TOOLKIT_PROJECTenvironment variable If you are participation in a workshop replaceprojectdemobased on your assigned username (ex.project01).TOOLKIT_PROJECT=projectdemoCreate a project/namespace using your project as prefix, and
-devand suffixoc sync $TOOLKIT_PROJECT-devFork application template git repo
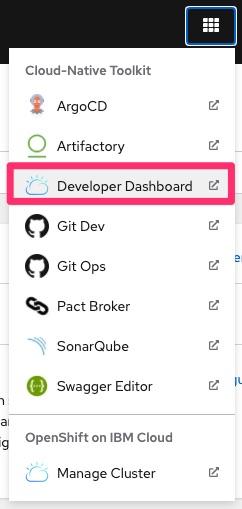
- Open Developer Dashboard from the OpenShift Console
- Select Starter Kits
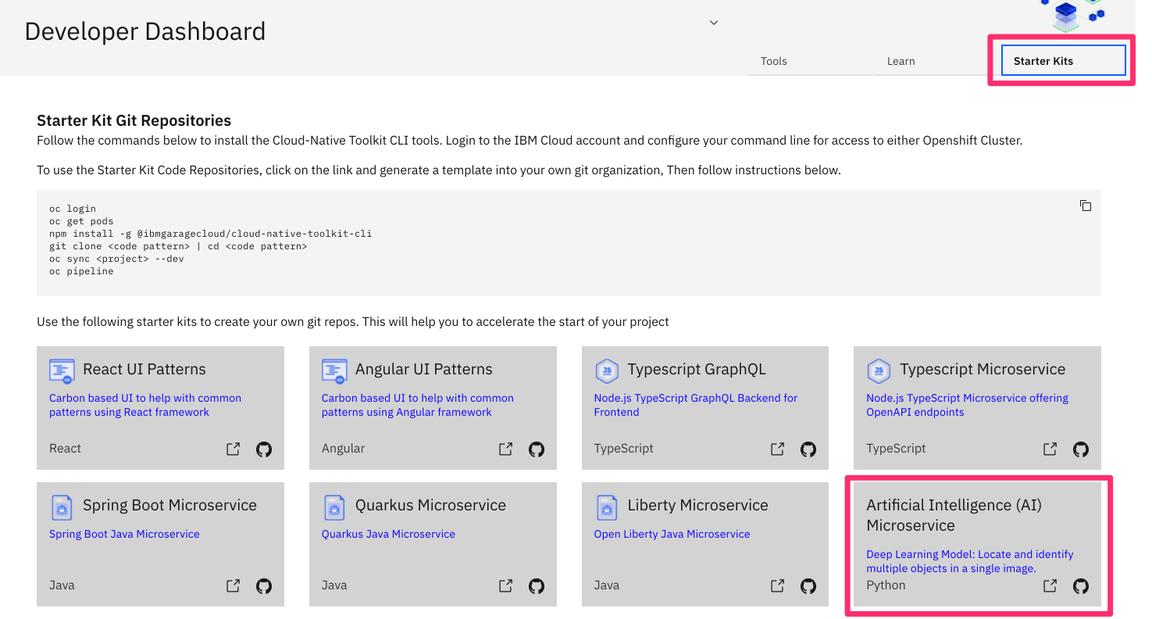
- Select One in our case Artificial Intelligence Microservice
- Click Fork
- Login into GIT Sever using the provided username and password (ie
userdemoandpassword) - Click Fork Repository
- Open Developer Dashboard from the OpenShift Console
Setup environment variable
GIT_URLfor the git url using the value from previous step or as following. Note: We are including username/password in git url for simplicity of this lab. You would NOT want to do this in your development environment.GIT_REPO=ai-model-object-detectorGIT_URL=http://${TOOLKIT_USERNAME}:password@$(oc get route -n tools gogs --template='{{.spec.host}}')/${TOOLKIT_USERNAME}/${GIT_REPO}echo GIT_URL=${GIT_URL}Clone the git repository and change directory
cd $HOMEgit clone $GIT_URL appcd appCreate a Tekton pipeline for the application
oc pipeline --tekton- Use down/up arrow and select
ibm-general - Enter n and hit Enter to disable image scanning
- Hit Enter to enable Dockerfile linting
- Hit Enter to select default health endpoint
/ - Open the url to see the pipeline running in the OpenShift Console
- Use down/up arrow and select
Verify that Pipeline Run completed successfully
- On the OpenShift web console select Pipelines
- At the top of the page select your development project/namespace created above (ex.
project01-dev) - The app pipeline last run status should be Succeeded
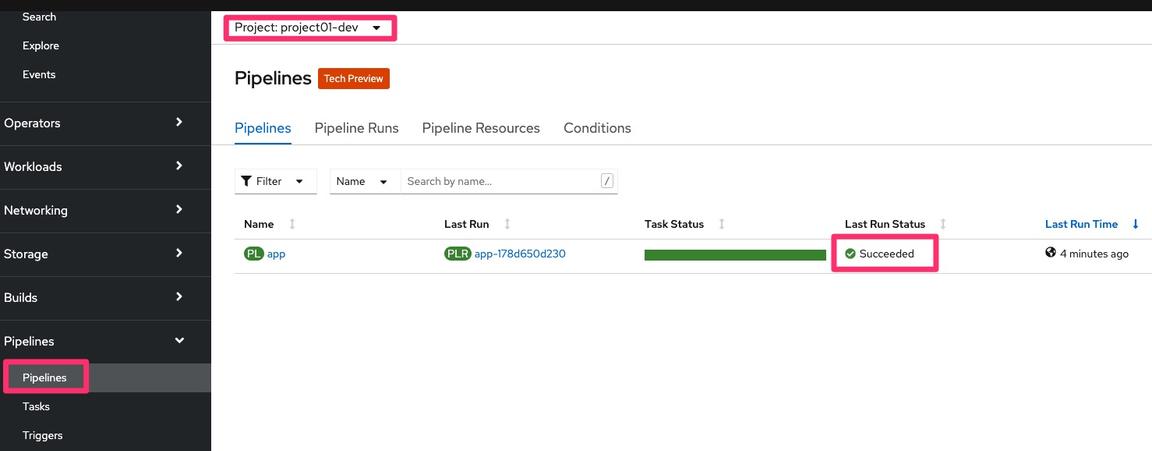
Review the Pipeline Tasks/Stages.
- Click on the last run

- Click on the Test task and view the logs

- Open SonarQube from Console Link
- Open Registry from Console Link
- Open Artifactory from Console Link
- Click on the last run
The gitops step of the pipeline triggeres Argo CD to deploy the app to QA. Select Developer perspective, select project
$TOOLKIT_PROJECT-qaand then select Topology from the Console and verify the application running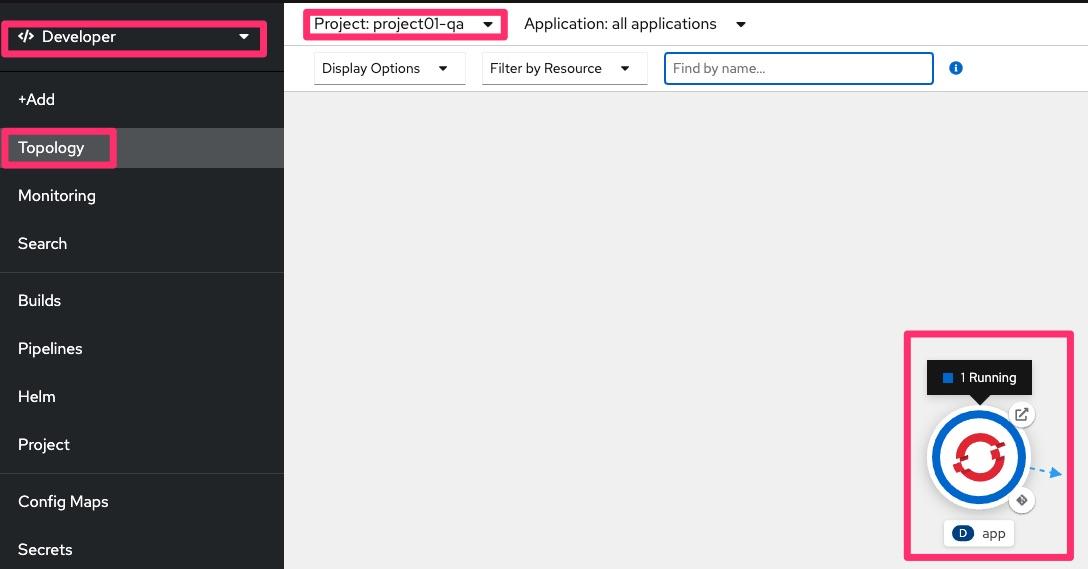
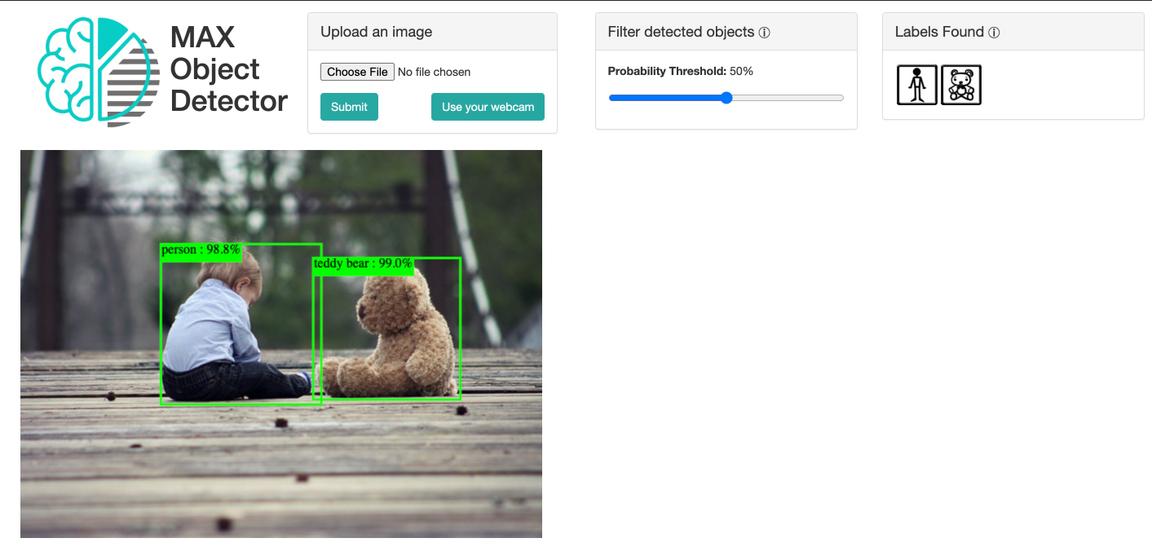
Open the application route url and try out the application using the swagger UI or append
/appto the URL to load Web UI for the Application. You can download the this sample picture to test the app
Make a change to the application in the git repository and see the pipeline running again from the Console. Lets chagne the Machine Learning being used from
ssd_mobilenet_v1tofaster_rcnn_resnet101git config --local user.email "${TOOLKIT_USERNAME}@example.com"git config --local user.name "${TOOLKIT_USERNAME}"sed -i 's/ssd_mobilenet_v1/faster_rcnn_resnet101/' Dockerfilegit add .git commit -m "update model"git push -u origin masterVerify that change in Git Server and Git WebHook
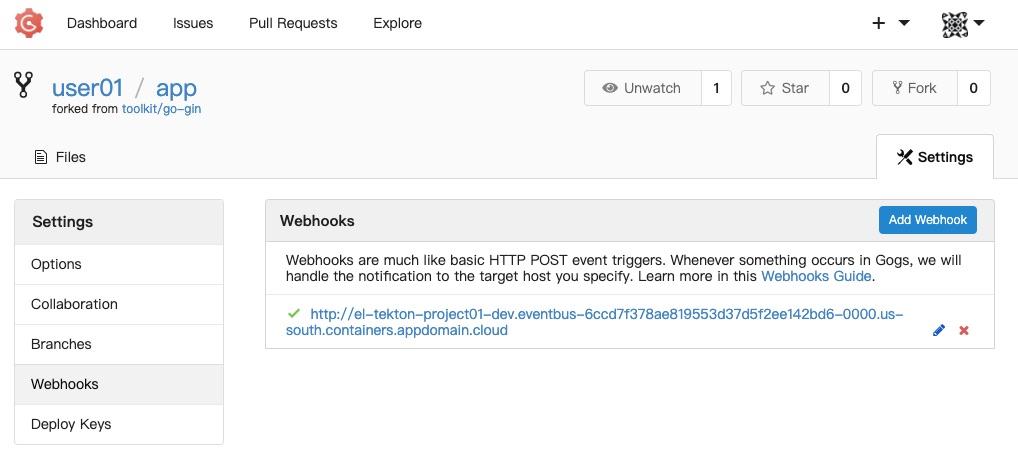
- Open Git Dev from Console Link
- Navigate to user app git repository
- Review the recent commit
- Review the webhook recent delivery
Verify that a new Pipeline starts successfully
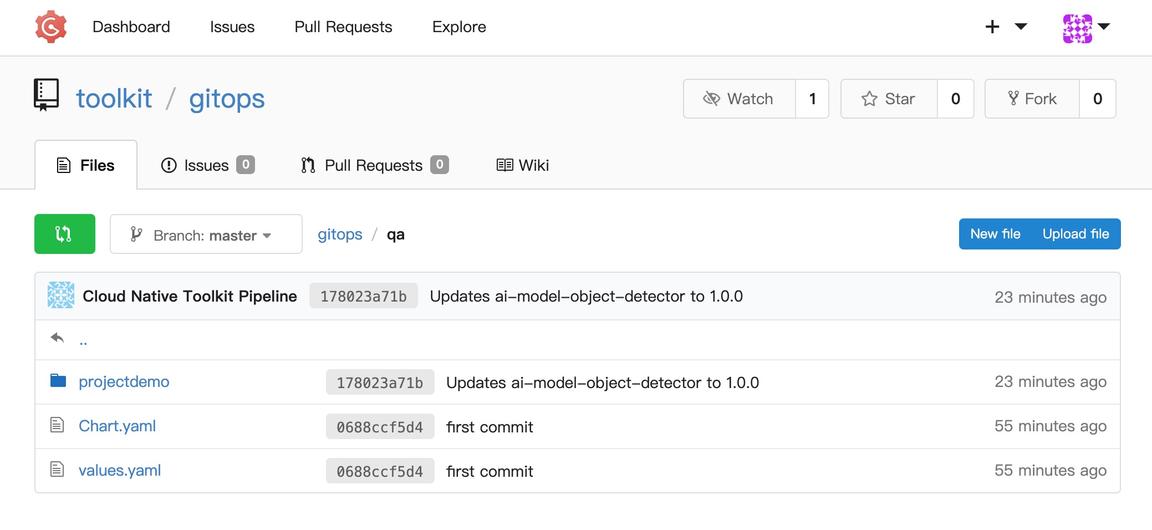
Verify that the App manifests are being updated in the
gitopsrepo in the git accounttoolkitunder theqadirectory.- Open Git Ops from Console Link
- Select toolkit/gitops git repository
Congratulations you finished this lab, continue with lab Promote an Application using CD with GitOps and ArgoCD